Home > Software > TMSB Tutorial 4F: Yellow Filter Processing
TMSB Tutorial 4F: Yellow Filter Processing
This tutorial describes a second customization suggested by Steve Smeed - the ability to recover near infrared, red, and green images from a single shot takes with a multispectrally-converted camera using a yellow filter in front of the lens.
As discussed in False Colour From Filters (and Simulated Filters), this is a technique developed by other photographers for mimicking Kodak's old EIR false-colour film, which mapped near infrared to red, red to green, and green to blue. It's simple, conceptually: a yellow filter blocks blue light, but allows near infrared through. As a result, the red channel is a mix of red and near infrared light, the green channel is a mix of green and near infrared light, and the blue channel is exclusively near infrared. So if one were to subtract the infrared value from the red channel and the green channel, they should end up with images that represent just red and just green, respectively.
This is a little harder to pull off in reality, because the exact mix of spectral bands will vary with lighting conditions, the camera's sensitivity to the various parts of the spectrum, and so on. But it is certainly possible to obtain very usable images, and the actual photos can be shot handheld, which I've found incredibly useful for doing "scouting" of areas to see if they are interesting enough in terms of infrared to do a full tripod-based shoot.
An enormous advantage to this technique is that autofocus and an optical viewfinder can both be used.
There are also a couple of disadvantages, assuming the shooter is using a conventional lens that doesn't focus near infrared to the same plane as human-visible light, and is using a conventional camera with a Bayer filter (IE not a camera with a Foveon sensor). The reasons for this are discussed further in the Cameras and Lenses articles.
In any case, as noted above, I definitely think this is worth doing. If nothing else, being able to shoot multispectral imagery handheld is a nice break from 15-minutes-per-shot tripod-based photography, and it allows scenes to be captured that are impractical or impossible with multiple exposures (e.g. non-posed photos of people, living animals, falling water, flames, clouds on a windy day).
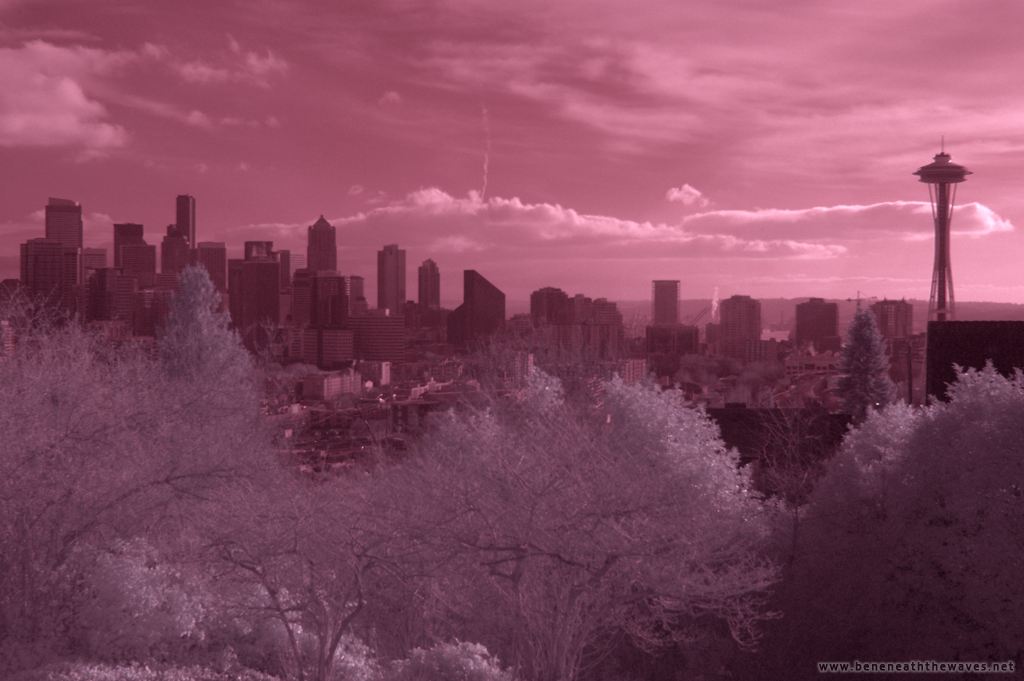
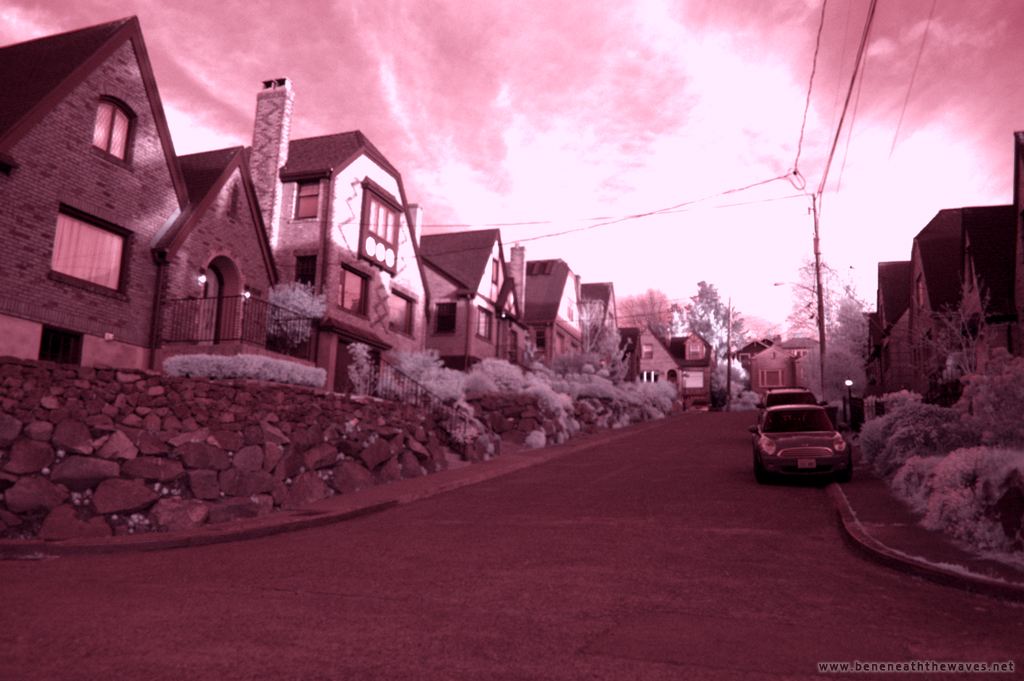
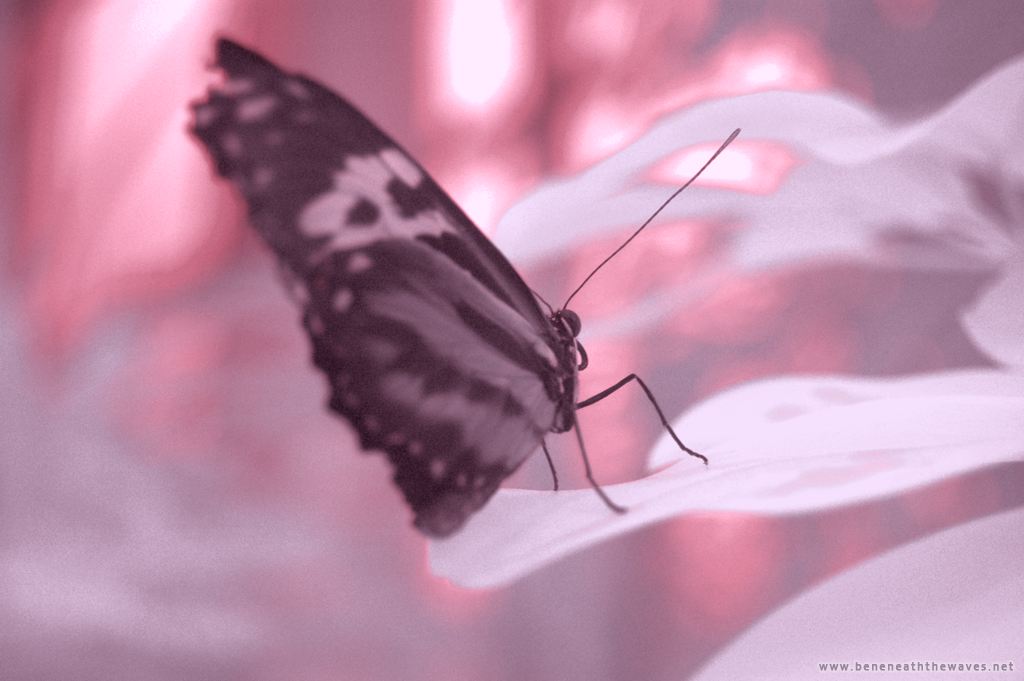
The method used in this tutorial requires that the source images be accurately white-balanced using a grey card which is grey into the near infrared part of the spectrum (such as the WhiBal card). When this is done, the images will have a very distinctive look: most plants will be purple or blue, most skies will be green, and so on:
| White-Balanced Example Images | ||||||||||||||
|
|
|
|
|
||||||||||
|
|
|
|
|
||||||||||
|
The "distinctive look" mentioned above. I think (but am not sure) that the "plant stalk" is a baby bamboo tree.
Date Shot: 2011-01-22 (Downtown Seattle), 2011-04-12 (Lake Union), 2011-04-25 (butterflies and some of the plants), 2011-04-28 (everything else)
|
||||||||||||||
This "look" is partly due to the white-balance actually over-correcting the blue channel. Because the red and green channels both consist of infrared plus another band, the blue channel is "brought up to their level", more or less doubling its brightness relative to the other two. However, having this fixed relationship between the channels is what makes the math easy enough to get right most of the time. Trying to create a formula that will work with arbitrary white-balance settings would be a significant effort.
These images can then be processed using a couple of variations (described below), and once the red and green images have been isolated, processing that requires them (such as the emulated "Classic R72" filter, or NDVI) can also be generated:
| Processed Example Images | ||||||||||||||
|
|
|
|
|
||||||||||
|
|
|
|
|
||||||||||
|
|
|
|
|
||||||||||
|
|
|
|
|
||||||||||
|
||||||||||||||
|
A few of the results of processible the white-balanced example images, above.
Date Shot: 2011-01-22 (Downtown Seattle), 2011-04-12 (Lake Union), 2011-04-25 (butterflies and some of the plants), 2011-04-28 (everything else)
|
||||||||||||||
To mimic the look of actual EIR film photos even further, one or more of these variations can be processed in your favourite image editor to increase the saturation, alter the contrast, and so forth. Steve suggested (based on one of my sample images), using a Selective Colour operation with the Colours set to Cyans, the Cyan level set to -25%, and the Magenta level set to +100%.
Steve also sent me a fairly dramatic Photoshop® action made by H.H. Pictures which performs the following operations after generating the initial NIR-R-G image (which it does using a slightly different technique):
The result is a little too intense for me in most cases, but it does look quite similar to actual EIR photos.
This tutorial makes use of a feature introduced in version 1.2 of The Mirror's Surface Breaks (custom script variables), so you will need that version or later. You will be creating at least two, and optionally four configuration files. A few sample source images are available at the bottom of the page to test with.
These instructions assume that the reader has gone through all of the previous tutorials in this section, except for TMSB Tutorial 4D: Klaus D. Schmitt Custom Colour-Processing Matrix, which is intended for advanced users only.
Like all of the tutorial configuration files, complete (and tested) versions of the results below are included in the Tutorial subdirectory of TMSB_Config wherever you unpacked the software to (TMSB version 1.2 or later). These can be used to refer to if you run into trouble, or you can just copy them into your TMSB_Config directory if you would rather just use them instead of know how to create custom configurations.
Yellow 12 Input Configuration
The first file to be created is the input configuration for the (white-balanced) original images. This is a generic input configuration that can be reused without modification for variations of this technique that use magenta or cyan filters to capture NIR-R-B and NIR-G-B (respectively) images in a single shot.
<SpectralBands>
<SpectralBand>
<BandName>
FSF-Red_Channel
</BandName>
<DataSources>
<DataSource>
<FileName>
In-FSF.TIF
</FileName>
<Plane>
1
</Plane>
</DataSource>
</DataSources>
<UseAsLuminanceChannel>
false
</UseAsLuminanceChannel>
<UseAsThreeChannelChannel>
false
</UseAsThreeChannelChannel>
</SpectralBand>
<SpectralBand>
<BandName>
FSF-Green_Channel
</BandName>
<DataSources>
<DataSource>
<FileName>
In-FSF.TIF
</FileName>
<Plane>
2
</Plane>
</DataSource>
</DataSources>
<UseAsLuminanceChannel>
false
</UseAsLuminanceChannel>
<UseAsThreeChannelChannel>
false
</UseAsThreeChannelChannel>
</SpectralBand>
<SpectralBand>
<BandName>
FSF-Blue_Channel
</BandName>
<DataSources>
<DataSource>
<FileName>
In-FSF.TIF
</FileName>
<Plane>
3
</Plane>
</DataSource>
</DataSources>
<UseAsLuminanceChannel>
false
</UseAsLuminanceChannel>
<UseAsThreeChannelChannel>
false
</UseAsThreeChannelChannel>
</SpectralBand>
</SpectralBands>
Yellow 12 Processing Configuration
Next, it's necessary to create the processing configuration that recovers red and green images and generates initial false-colour results.
<ScriptVariables>
</ScriptVariables>
<StatisticalGreyscaleCubes>
</StatisticalGreyscaleCubes>
<CustomGreyscaleChannels>
</CustomGreyscaleChannels>
<CombinedBandChannels>
</CombinedBandChannels>
<CalculatedChannelSets>
</CalculatedChannelSets>
<CustomThreeChannelImages>
</CustomThreeChannelImages>
<DCSVariations>
</DCSVariations>
<TintMapping>
</TintMapping>
<GradientMapping>
</GradientMapping>
<GenerateStatisticalChannels>
false
</GenerateStatisticalChannels>
<GenerateCalculatedChannels>
false
</GenerateCalculatedChannels>
<GenerateCustomChannels>
false
</GenerateCustomChannels>
<GenerateTintedImages>
false
</GenerateTintedImages>
<GenerateGradientImages>
false
</GenerateGradientImages>
<GenerateThreeChannelImages>
false
</GenerateThreeChannelImages>
<GenerateStandardThreeChannelImages>
false
</GenerateStandardThreeChannelImages>
<GenerateCustomThreeChannelImages>
false
</GenerateCustomThreeChannelImages>
<GenerateCalculatedThreeChannelImages>
false
</GenerateCalculatedThreeChannelImages>
<GenerateLumaColourImages>
false
</GenerateLumaColourImages>
<GenerateDCSImages>
false
</GenerateDCSImages>
<GenerateStatisticalImageThreeChannelPermutations>
false
</GenerateStatisticalImageThreeChannelPermutations>
<GenerateStatisticalImageThreeChannelPermutationsUnrestricted>
false
</GenerateStatisticalImageThreeChannelPermutationsUnrestricted>
<GenerateLumaColourVariationsFromIndividualBands>
false
</GenerateLumaColourVariationsFromIndividualBands>
<GenerateLumaColourVariationsFromCombinedChannels>
false
</GenerateLumaColourVariationsFromCombinedChannels>
<GenerateLumaColourVariationsFromStatisticalChannels>
false
</GenerateLumaColourVariationsFromStatisticalChannels>
<GenerateLumaColourVariationsFromThreeChannelImages>
false
</GenerateLumaColourVariationsFromThreeChannelImages>
<GenerateLumaColourVariationsFromDCSImages>
false
</GenerateLumaColourVariationsFromDCSImages>
<GenerateDCSImagesFromIndividualChannels>
false
</GenerateDCSImagesFromIndividualChannels>
<GenerateDCSImagesFromCombinedChannels>
false
</GenerateDCSImagesFromCombinedChannels>
<GenerateDCSImagesFromCustomThreeChannelImages>
false
</GenerateDCSImagesFromCustomThreeChannelImages>
<GenerateDCSEnhancedContrast>
false
</GenerateDCSEnhancedContrast>
<ScriptVariables>
<ScriptVariable>
<Name>
RedChannelIRLevel
</Name>
<Value>
0.5
</Value>
</ScriptVariable>
<ScriptVariable>
<Name>
GreenChannelIRLevel
</Name>
<Value>
0.5
</Value>
</ScriptVariable>
<ScriptVariable>
<Name>
RedCustomGamma
</Name>
<Value>
0.6
</Value>
</ScriptVariable>
<ScriptVariable>
<Name>
GreenCustomGamma
</Name>
<Value>
1.29
</Value>
</ScriptVariable>
<ScriptVariable>
<Name>
RedGreenSeparation
</Name>
<Value>
0.2
</Value>
</ScriptVariable>
</ScriptVariables>
<CustomGreyscaleChannel>
<ChannelName>
NIR
</ChannelName>
<Type>
CustomScriptCode
</Type>
<CustomScriptCode>
= %ChannelByName:FSF-Blue_Channel%
</CustomScriptCode>
<UseAsLuminanceChannel>
false
</UseAsLuminanceChannel>
<UseAsThreeChannelChannel>
false
</UseAsThreeChannelChannel>
</CustomGreyscaleChannel>
<CustomGreyscaleChannel>
<ChannelName>
Red
</ChannelName>
<Type>
CustomScriptCode
</Type>
<CustomScriptCode>
= (%ChannelByName:FSF-Red_Channel% - (%ChannelByName:NIR% * %Var:RedChannelIRLevel%)) / (1.0 - %Var:RedChannelIRLevel%)
</CustomScriptCode>
<UseAsLuminanceChannel>
false
</UseAsLuminanceChannel>
<UseAsThreeChannelChannel>
false
</UseAsThreeChannelChannel>
<OutputTransformation>
Clip: 0.0 - 1.0
</OutputTransformation>
</CustomGreyscaleChannel>
<CustomGreyscaleChannel>
<ChannelName>
Green
</ChannelName>
<Type>
CustomScriptCode
</Type>
<CustomScriptCode>
= (%ChannelByName:FSF-Green_Channel% - (%ChannelByName:NIR% * %Var:GreenChannelIRLevel%)) / (1.0 - %Var:RedChannelIRLevel%)
</CustomScriptCode>
<UseAsLuminanceChannel>
false
</UseAsLuminanceChannel>
<UseAsThreeChannelChannel>
false
</UseAsThreeChannelChannel>
<OutputTransformation>
Clip: 0.0 - 1.0
</OutputTransformation>
</CustomGreyscaleChannel>
<CustomGreyscaleChannel>
<ChannelName>
NIR-Normalized
</ChannelName>
<Type>
CustomScriptCode
</Type>
<CustomScriptCode>
= %ChannelByName:FSF-Blue_Channel%
</CustomScriptCode>
<UseAsLuminanceChannel>
false
</UseAsLuminanceChannel>
<UseAsThreeChannelChannel>
false
</UseAsThreeChannelChannel>
<OutputTransformation>
Normalize: Militant
</OutputTransformation>
</CustomGreyscaleChannel>
<CustomGreyscaleChannel>
<ChannelName>
Red-Normalized
</ChannelName>
<Type>
CustomScriptCode
</Type>
<CustomScriptCode>
= (%ChannelByName:FSF-Red_Channel% - (%ChannelByName:NIR% * %Var:RedChannelIRLevel%)) / (1.0 - %Var:RedChannelIRLevel%)
</CustomScriptCode>
<UseAsLuminanceChannel>
false
</UseAsLuminanceChannel>
<UseAsThreeChannelChannel>
false
</UseAsThreeChannelChannel>
<OutputTransformation>
Normalize: Militant
</OutputTransformation>
</CustomGreyscaleChannel>
<CustomGreyscaleChannel>
<ChannelName>
Green-Normalized
</ChannelName>
<Type>
CustomScriptCode
</Type>
<CustomScriptCode>
= (%ChannelByName:FSF-Green_Channel% - (%ChannelByName:NIR% * %Var:GreenChannelIRLevel%)) / (1.0 - %Var:RedChannelIRLevel%)
</CustomScriptCode>
<UseAsLuminanceChannel>
false
</UseAsLuminanceChannel>
<UseAsThreeChannelChannel>
false
</UseAsThreeChannelChannel>
<OutputTransformation>
Normalize: Militant
</OutputTransformation>
</CustomGreyscaleChannel>
<CustomGreyscaleChannel>
<ChannelName>
Red-Custom_Gamma
</ChannelName>
<Type>
CustomScriptCode
</Type>
<CustomScriptCode>
= pow(%ChannelByName:Red%, (1.0 / %Var:RedCustomGamma%))
</CustomScriptCode>
<UseAsLuminanceChannel>
false
</UseAsLuminanceChannel>
<UseAsThreeChannelChannel>
false
</UseAsThreeChannelChannel>
<OutputTransformation>
Clip: 0.0 - 1.0
</OutputTransformation>
</CustomGreyscaleChannel>
<CustomGreyscaleChannel>
<ChannelName>
Green-Custom_Gamma
</ChannelName>
<Type>
CustomScriptCode
</Type>
<CustomScriptCode>
= pow(%ChannelByName:Green%, (1.0 / %Var:GreenCustomGamma%))
</CustomScriptCode>
<UseAsLuminanceChannel>
false
</UseAsLuminanceChannel>
<UseAsThreeChannelChannel>
false
</UseAsThreeChannelChannel>
<OutputTransformation>
Clip: 0.0 - 1.0
</OutputTransformation>
</CustomGreyscaleChannel>
<CustomGreyscaleChannel>
<ChannelName>
Red-Separated
</ChannelName>
<Type>
CustomScriptCode
</Type>
<CustomScriptCode>
= (%ChannelByName:Red% - (%ChannelByName:Green% * %Var:RedGreenSeparation%) + (%ChannelByName:Red% * %Var:RedGreenSeparation%))
</CustomScriptCode>
<UseAsLuminanceChannel>
false
</UseAsLuminanceChannel>
<UseAsThreeChannelChannel>
false
</UseAsThreeChannelChannel>
<OutputTransformation>
Clip: 0.0 - 1.0
</OutputTransformation>
</CustomGreyscaleChannel>
<CustomGreyscaleChannel>
<ChannelName>
Green-Separated
</ChannelName>
<Type>
CustomScriptCode
</Type>
<CustomScriptCode>
= (%ChannelByName:Green% - (%ChannelByName:Red% * %Var:RedGreenSeparation%) + (%ChannelByName:Green% * %Var:RedGreenSeparation%))
</CustomScriptCode>
<UseAsLuminanceChannel>
false
</UseAsLuminanceChannel>
<UseAsThreeChannelChannel>
false
</UseAsThreeChannelChannel>
<OutputTransformation>
Clip: 0.0 - 1.0
</OutputTransformation>
</CustomGreyscaleChannel>
<CustomGreyscaleChannel>
<ChannelName>
Red-Separated-Normalized
</ChannelName>
<Type>
CustomScriptCode
</Type>
<CustomScriptCode>
= (%ChannelByName:Red% - (%ChannelByName:Green% * %Var:RedGreenSeparation%) + (%ChannelByName:Red% * %Var:RedGreenSeparation%))
</CustomScriptCode>
<UseAsLuminanceChannel>
false
</UseAsLuminanceChannel>
<UseAsThreeChannelChannel>
false
</UseAsThreeChannelChannel>
<OutputTransformation>
Normalize: Militant
</OutputTransformation>
</CustomGreyscaleChannel>
<CustomGreyscaleChannel>
<ChannelName>
Green-Separated-Normalized
</ChannelName>
<Type>
CustomScriptCode
</Type>
<CustomScriptCode>
= (%ChannelByName:Green% - (%ChannelByName:Red% * %Var:RedGreenSeparation%) + (%ChannelByName:Green% * %Var:RedGreenSeparation%))
</CustomScriptCode>
<UseAsLuminanceChannel>
false
</UseAsLuminanceChannel>
<UseAsThreeChannelChannel>
false
</UseAsThreeChannelChannel>
<OutputTransformation>
Normalize: Militant
</OutputTransformation>
</CustomGreyscaleChannel>
<CustomGreyscaleChannel>
<ChannelName>
Red-Separated-Custom_Gamma
</ChannelName>
<Type>
CustomScriptCode
</Type>
<CustomScriptCode>
= pow(%ChannelByName:Red-Separated%, (1.0 / %Var:RedCustomGamma%))
</CustomScriptCode>
<UseAsLuminanceChannel>
false
</UseAsLuminanceChannel>
<UseAsThreeChannelChannel>
false
</UseAsThreeChannelChannel>
<OutputTransformation>
Clip: 0.0 - 1.0
</OutputTransformation>
</CustomGreyscaleChannel>
<CustomGreyscaleChannel>
<ChannelName>
Green-Separated-Custom_Gamma
</ChannelName>
<Type>
CustomScriptCode
</Type>
<CustomScriptCode>
= pow(%ChannelByName:Green-Separated%, (1.0 / %Var:GreenCustomGamma%))
</CustomScriptCode>
<UseAsLuminanceChannel>
false
</UseAsLuminanceChannel>
<UseAsThreeChannelChannel>
false
</UseAsThreeChannelChannel>
<OutputTransformation>
Clip: 0.0 - 1.0
</OutputTransformation>
</CustomGreyscaleChannel>
To break down the basic equation:
[Red] = (%ChannelByName:FSF-Red_Channel% - (%ChannelByName:NIR% * %Var:RedChannelIRLevel%)) / (1.0 - %Var:RedChannelIRLevel%)
<CustomThreeChannelImage>
<UserDefinedName>
FC-3C-NIR-R-G
</UserDefinedName>
<RedChannelName>
NIR
</RedChannelName>
<GreenChannelName>
Red
</GreenChannelName>
<BlueChannelName>
Green
</BlueChannelName>
<IncludeInSecondOrderImages>
true
</IncludeInSecondOrderImages>
<OutputTransformation>
Normalize: Standard
</OutputTransformation>
</CustomThreeChannelImage>
<CustomThreeChannelImage>
<UserDefinedName>
FC-3C-NIR-R-G_(Custom_Gamma)
</UserDefinedName>
<RedChannelName>
NIR
</RedChannelName>
<GreenChannelName>
Red-Custom_Gamma
</GreenChannelName>
<BlueChannelName>
Green-Custom_Gamma
</BlueChannelName>
<IncludeInSecondOrderImages>
true
</IncludeInSecondOrderImages>
<OutputTransformation>
Normalize: Standard
</OutputTransformation>
</CustomThreeChannelImage>
<CustomThreeChannelImage>
<UserDefinedName>
FC-3C-NIR-R-G_(Normalized)
</UserDefinedName>
<RedChannelName>
NIR-Normalized
</RedChannelName>
<GreenChannelName>
Red-Normalized
</GreenChannelName>
<BlueChannelName>
Green-Normalized
</BlueChannelName>
<IncludeInSecondOrderImages>
true
</IncludeInSecondOrderImages>
<OutputTransformation>
Normalize: Standard
</OutputTransformation>
</CustomThreeChannelImage>
<CustomThreeChannelImage>
<UserDefinedName>
FC-3C-NIR-R-G_(RG_Separated)
</UserDefinedName>
<RedChannelName>
NIR
</RedChannelName>
<GreenChannelName>
Red-Separated
</GreenChannelName>
<BlueChannelName>
Green-Separated
</BlueChannelName>
<IncludeInSecondOrderImages>
true
</IncludeInSecondOrderImages>
<OutputTransformation>
Normalize: Standard
</OutputTransformation>
</CustomThreeChannelImage>
<CustomThreeChannelImage>
<UserDefinedName>
FC-3C-NIR-R-G_(RG_Separated-Normalized)
</UserDefinedName>
<RedChannelName>
NIR-Normalized
</RedChannelName>
<GreenChannelName>
Red-Separated-Normalized
</GreenChannelName>
<BlueChannelName>
Green-Separated-Normalized
</BlueChannelName>
<IncludeInSecondOrderImages>
true
</IncludeInSecondOrderImages>
<OutputTransformation>
Normalize: Standard
</OutputTransformation>
</CustomThreeChannelImage>
<CustomThreeChannelImage>
<UserDefinedName>
FC-3C-NIR-R-G_(RG_Separated-Custom_Gamma)
</UserDefinedName>
<RedChannelName>
NIR
</RedChannelName>
<GreenChannelName>
Red-Separated-Custom_Gamma
</GreenChannelName>
<BlueChannelName>
Green-Separated-Custom_Gamma
</BlueChannelName>
<IncludeInSecondOrderImages>
true
</IncludeInSecondOrderImages>
<OutputTransformation>
Normalize: Standard
</OutputTransformation>
</CustomThreeChannelImage>
Extra Credit Part 1: NIR-R-G Input Configuration
To create further output variations, we'll build a file that re-reads the NIR-R-G false colour image output by the first set as a new input file, and maps it to the special band names NearInfraredNonspecific, Red, and Green, for use with existing processing configurations.
<SpectralBands>
<SpectralBand>
<BandName>
NIR
</BandName>
<DataSources>
<DataSource>
<FileName>
FC-3C-NIR-R-G.TIF
</FileName>
<Plane>
1
</Plane>
</DataSource>
</DataSources>
<BandCategory>
NearInfrared
</BandCategory>
<SpecialBandName>
NearInfraredNonspecific
</SpecialBandName>
<UseAsLuminanceChannel>
true
</UseAsLuminanceChannel>
<UseAsThreeChannelChannel>
true
</UseAsThreeChannelChannel>
</SpectralBand>
<SpectralBand>
<BandName>
R
</BandName>
<DataSources>
<DataSource>
<FileName>
FC-3C-NIR-R-G.TIF
</FileName>
<Plane>
2
</Plane>
</DataSource>
</DataSources>
<BandCategory>
HumanVisible
</BandCategory>
<SpecialBandName>
Red
</SpecialBandName>
<UseAsLuminanceChannel>
false
</UseAsLuminanceChannel>
<UseAsThreeChannelChannel>
true
</UseAsThreeChannelChannel>
</SpectralBand>
<SpectralBand>
<BandName>
G
</BandName>
<DataSources>
<DataSource>
<FileName>
FC-3C-NIR-R-G.TIF
</FileName>
<Plane>
3
</Plane>
</DataSource>
</DataSources>
<BandCategory>
HumanVisible
</BandCategory>
<SpecialBandName>
Green
</SpecialBandName>
<UseAsLuminanceChannel>
false
</UseAsLuminanceChannel>
<UseAsThreeChannelChannel>
true
</UseAsThreeChannelChannel>
</SpectralBand>
</SpectralBands>
Extra Credit Part 2: Example Processing Configuration
Optionally, create a custom processing file to generate your favourite variations that require near infrared and red source imagery. This section assumes that "your favourite variations" are the "Classic R72" filter emulation and the NDVI variation which uses the most conservative (colour-wise) gradient.
<CustomGreyscaleChannel>
<ChannelName>
Calculated-NDVI_(Full_Range)
</ChannelName>
<Type>
CustomScriptCode
</Type>
<CustomScriptCode>
= ndi(%SpecialBand:NearInfraredNonspecific%, %SpecialBand:Red%)
</CustomScriptCode>
<UseAsLuminanceChannel>
false
</UseAsLuminanceChannel>
<UseAsThreeChannelChannel>
false
</UseAsThreeChannelChannel>
<OutputTransformation>
Specialized: Vegetation Index Biased Normalization
</OutputTransformation>
</CustomGreyscaleChannel>
<GradientMappedChannel>
<ReferenceType>
ChannelByName
</ReferenceType>
<ChannelReference>
Calculated-NDVI_(Full_Range)
</ChannelReference>
<GradientName>
Vegetation_Index_Single_Scale
</GradientName>
<IncludeInSecondOrderImages>
true
</IncludeInSecondOrderImages>
</GradientMappedChannel>
<CustomGreyscaleChannel>
<ChannelName>
Custom-R72_Classic-Red
</ChannelName>
<Type>
CustomScriptCode
</Type>
<CustomScriptCode>
= (pow((((%SpecialBand:NearInfraredNonspecific% * 0.8) + (%SpecialBand:Red% * 0.2))), 0.65) - 0.10) * 1.30
</CustomScriptCode>
<UseAsLuminanceChannel>
false
</UseAsLuminanceChannel>
<UseAsThreeChannelChannel>
false
</UseAsThreeChannelChannel>
<OutputTransformation>
Clip: 0.0 - 1.0
</OutputTransformation>
</CustomGreyscaleChannel>
<CustomGreyscaleChannel>
<ChannelName>
Custom-R72_Classic-Green
</ChannelName>
<Type>
CustomScriptCode
</Type>
<CustomScriptCode>
= pow(((%SpecialBand:NearInfraredNonspecific% - 0.06) / 1.02), 0.97)
</CustomScriptCode>
<UseAsLuminanceChannel>
false
</UseAsLuminanceChannel>
<UseAsThreeChannelChannel>
false
</UseAsThreeChannelChannel>
<OutputTransformation>
Clip: 0.0 - 1.0
</OutputTransformation>
</CustomGreyscaleChannel>
<CustomGreyscaleChannel>
<ChannelName>
Custom-R72_Classic-Blue
</ChannelName>
<Type>
CustomScriptCode
</Type>
<CustomScriptCode>
= pow(((%SpecialBand:NearInfraredNonspecific% - 0.01) / 0.91), 0.87) - 0.04
</CustomScriptCode>
<UseAsLuminanceChannel>
false
</UseAsLuminanceChannel>
<UseAsThreeChannelChannel>
false
</UseAsThreeChannelChannel>
<OutputTransformation>
Clip: 0.0 - 1.0
</OutputTransformation>
</CustomGreyscaleChannel>
<CustomThreeChannelImage>
<UserDefinedName>
FC-3C-Custom-R72_Classic
</UserDefinedName>
<RedChannelName>
Custom-R72_Classic-Red
</RedChannelName>
<GreenChannelName>
Custom-R72_Classic-Green
</GreenChannelName>
<BlueChannelName>
Custom-R72_Classic-Blue
</BlueChannelName>
<IncludeInSecondOrderImages>
true
</IncludeInSecondOrderImages>
<OutputTransformation>
Normalize: Standard
</OutputTransformation>
</CustomThreeChannelImage>
| Download | ||||
| File | Size | Version | Release Date | Author |
| Yellow 12 Filter Example Images | 7 MiB | 1.0 | 2011-05-01 | Ben Lincoln |
| A set of three sample images for use with the TMSB tutorial "Yellow Filter Processing". Each source image will generate output images that occupy about 2.5 MiB on disk for each variation in the selected processing configuration. | ||||
| 1. | If someone wanted to put the time into developing this method, they could probably take it one step further: after recovering the red and green images, subtract those from the original red and green channels to obtain the near infrared data from those, and then take the median, maximum, or average to get a higher-resolution version of the image. |
| 2. | My working assumption is currently that PixelBender does something like reposition values so that none of them are negative. IE a simple example would be that if it is guaranteed that no input values are less than -1.0, then add 1.0 to everything before applying exponential functions, and subtract 1.0 afterward. Because it doesn't seem to be just applying regular math, I didn't feel like spending more time trying to reverse-engineer its bizarre behaviour. |
| 3. | Basically, the idea (in a standard red/green/blue image) is to subtract some percentage of the red channel from the green channel, that same percentage of the green channel from the red channel, some percentage of the blue channel from the green channel, that same percentage of the green channel from the blue channel, and then boost the levels of all three channels back up to compensate. I'll be posting a full description of this soon (assuming it's not already a commonly-known technique), but ran out of time while working on this update. |
|
|
![[ Plant stalk closeup ]](/Software/Images/T10-SS_Yellow_XML_Customization-01-White_Balance-01-Plant-01.JPG)
![[ Flowers ]](/Software/Images/T10-SS_Yellow_XML_Customization-01-White_Balance-02-Flower-01.JPG)
![[ Houses on top of Queen Anne ]](/Software/Images/T10-SS_Yellow_XML_Customization-01-White_Balance-03-Houses.JPG)
![[ A butterfly ]](/Software/Images/T10-SS_Yellow_XML_Customization-01-White_Balance-04-Butterfly-01.JPG)
![[ A second butterfly ]](/Software/Images/T10-SS_Yellow_XML_Customization-01-White_Balance-05-Butterfly-02.JPG)
![[ A third butterfly ]](/Software/Images/T10-SS_Yellow_XML_Customization-01-White_Balance-06-Butterfly-03.JPG)
![[ A larger flower ]](/Software/Images/T10-SS_Yellow_XML_Customization-01-White_Balance-07-Flower-02.JPG)
![[ Baby plant leaves ]](/Software/Images/T10-SS_Yellow_XML_Customization-01-White_Balance-08-Plant-02.JPG)
![[ Lake Union, Gasworks Park, and Fremont ]](/Software/Images/T10-SS_Yellow_XML_Customization-01-White_Balance-09-Lake_Union.JPG)
![[ Downtown Seattle ]](/Software/Images/T10-SS_Yellow_XML_Customization-01-White_Balance-10-Downtown_Seattle.JPG)
![[ NIR-R-G (normalized) ]](/Software/Images/T10-SS_Yellow_XML_Customization-02-Processed-01A-Plant-01-NIR-R-G_(Normalized).JPG)
![[ NIR-R-G (enhanced red/green separation, normalized) ]](/Software/Images/T10-SS_Yellow_XML_Customization-02-Processed-02A-Flower-01-NIR-R-G_(RG_Separated-Normalized).JPG)
![[ NIR-R-G (normalized) ]](/Software/Images/T10-SS_Yellow_XML_Customization-02-Processed-03A-Houses-NIR-R-G_(Normalized).JPG)
![[ NIR-R-G (enhanced red/green separation, normalized) ]](/Software/Images/T10-SS_Yellow_XML_Customization-02-Processed-03B-Houses-NIR-R-G_(RG_Separated-Normalized).JPG)
![[ Normalized Difference Vegetation Index [Greyscale] ]](/Software/Images/T10-SS_Yellow_XML_Customization-02-Processed-03D-Houses-NDVI_Grey.JPG)
![[ NDVI [Gradient] ]](/Software/Images/T10-SS_Yellow_XML_Customization-02-Processed-03E-Houses-NDVI_Gradient.JPG)
![[ NIR-R-G (normalized) ]](/Software/Images/T10-SS_Yellow_XML_Customization-02-Processed-04A-Butterfly-01-NIR-R-G_(Normalized).JPG)
![[ NIR-R-G (normalized) ]](/Software/Images/T10-SS_Yellow_XML_Customization-02-Processed-05A-Butterfly-02-NIR-R-G_(Normalized).JPG)
![[ NIR-R-G (normalized) ]](/Software/Images/T10-SS_Yellow_XML_Customization-02-Processed-06A-Butterfly-03-NIR-R-G_(Normalized).JPG)
![[ NIR-R-G (normalized) ]](/Software/Images/T10-SS_Yellow_XML_Customization-02-Processed-07A-Flower-02-NIR-R-G_(Normalized).JPG)
![[ NIR-R-G (enhanced red/green separation, custom gamma) ]](/Software/Images/T10-SS_Yellow_XML_Customization-02-Processed-08A-Plant-02-NIR-R-G_(RG_Separated-Custom_Gamma).JPG)
![[ NIR-R-G (enhanced red/green separation, normalized) ]](/Software/Images/T10-SS_Yellow_XML_Customization-02-Processed-08B-Plant-02-NIR-R-G_(RG_Separated-Normalized).JPG)
![[ NDVI [Gradient] ]](/Software/Images/T10-SS_Yellow_XML_Customization-02-Processed-08C-Plant-02-NDVI-Gradient.JPG)
![[ NIR-R-G (enhanced red/green separation, normalized) ]](/Software/Images/T10-SS_Yellow_XML_Customization-02-Processed-09A-Lake_Union-NIR-R-G_(RG_Separated-Normalized).JPG)
![[ NIR-R-G (custom gamma) ]](/Software/Images/T10-SS_Yellow_XML_Customization-02-Processed-09B-Lake_Union-NIR-R-G_(Custom_Gamma).JPG)

![[ NDVI [Gradient] ]](/Software/Images/T10-SS_Yellow_XML_Customization-02-Processed-09D-Lake_Union-NDVI.JPG)
![[ NIR-R-G (normalized) ]](/Software/Images/T10-SS_Yellow_XML_Customization-02-Processed-10A-Downtown_Seattle-NIR-R-G_(Normalized).JPG)